TierHive backup chroot
If you have to temporary use a backup or you want to modify its content, instead or restoring it, you can use chroot.
This example shows 2 different VPS, you can create a second one or an existing one.
Summary
- Go to the VPS you have the backup you want to work with.
- Attach the backup to the VPS you want to chroot.
- Mount the drive to the mount directory
- Chroot the mounted OS.
- Work in the chrooted backup.
- Exit the chroot.
- Detach the backup.
1.  2.
2. 
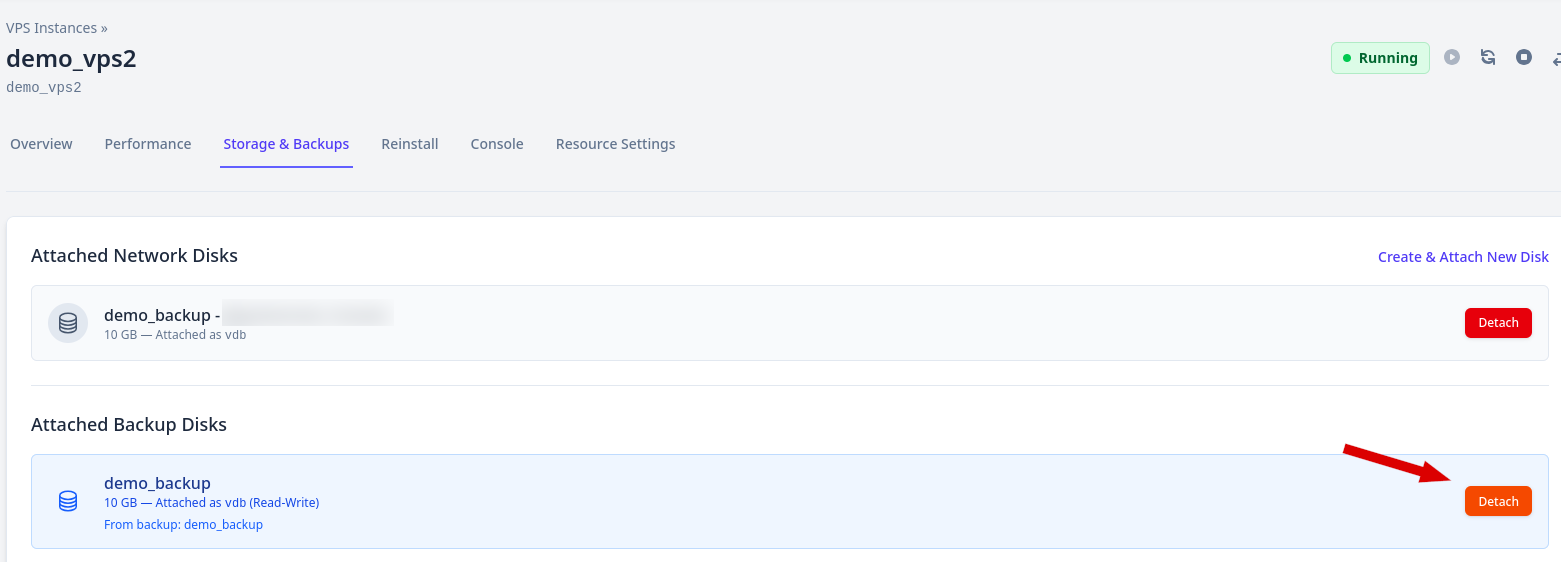
 In the destination VPS Storage & Backups, you can see the backup disk mounted.
 3. Locate the partition to mount using lsblk or fdisk -l.
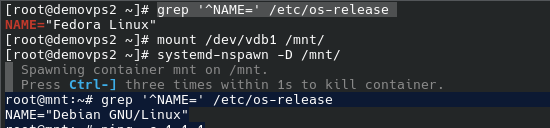
lsblk
 In the example above, the target partition is /dev/vdb1
Mount the target partition.
mount /dev/vdb1 /mnt/
4. To chroot the backup partition you can use our article here or simply use systemd-nspawn. If you decide to use systemd-nspawn, you have to install the package systemd-container.
⚠ Please note that systemd-nspawn requiere systemd, that is not compatible using our alpine linux or BSDs distributions.
#Using RedHat like distribution
dnf install systemd-container -y
#Using Debian like distribution
apt update && apt install systemd-container -yq
Using Arch distribution, it is installed in our basic installation.
To use systemd-nspawn, run the following commands.
systemd-nspawn -D /mnt/
6. To exit the process, enter “exit” in the terminal or press <ctrl>+d
exit
umount /mnt
7.Detach the backup using our panel.